My tiny creative corner


I have always dreamed of having my own space to create. A place where I could have all my books displayed, all my supplies organised by type and colour, where my sewing machine would always be ready to use, where I could leave all my on-going projects on a desk without having to tidy up every time, a place with lots of storage units and a big desk where I could do some proper painting. Well, this is still a dream, but I’m working on it.
In the meantime, I tried to make the best of what I have available, meaning just above 1 square meter of space stuck against our living room wall.
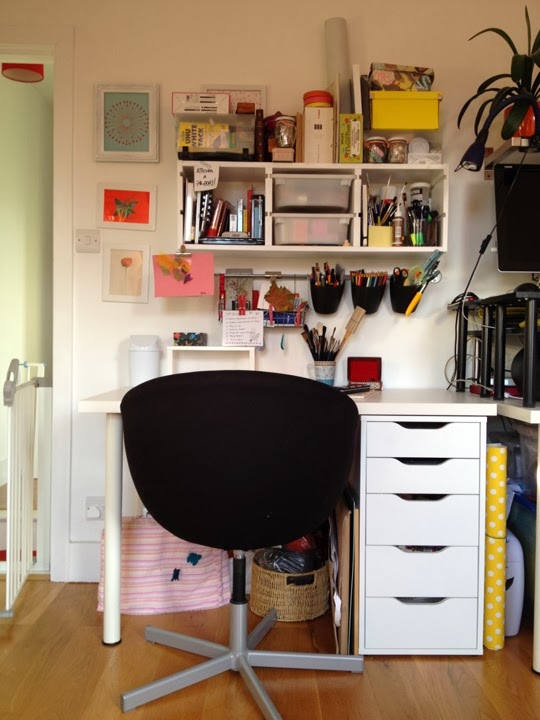
The space is tiny, but is well organised with minimal furniture (thanks IKEA!): a white desk and a very useful drawer unit, a readapted and painted wall storage unit and a black swivel armchair.

The desk area is where I do all my crafting, painting, writing (obviously!), so I try to keep it clear to avoid having to tidy it up before starting any work.
Unfortunately it doesn’t always work and most of the time the desk is covered in clutter.
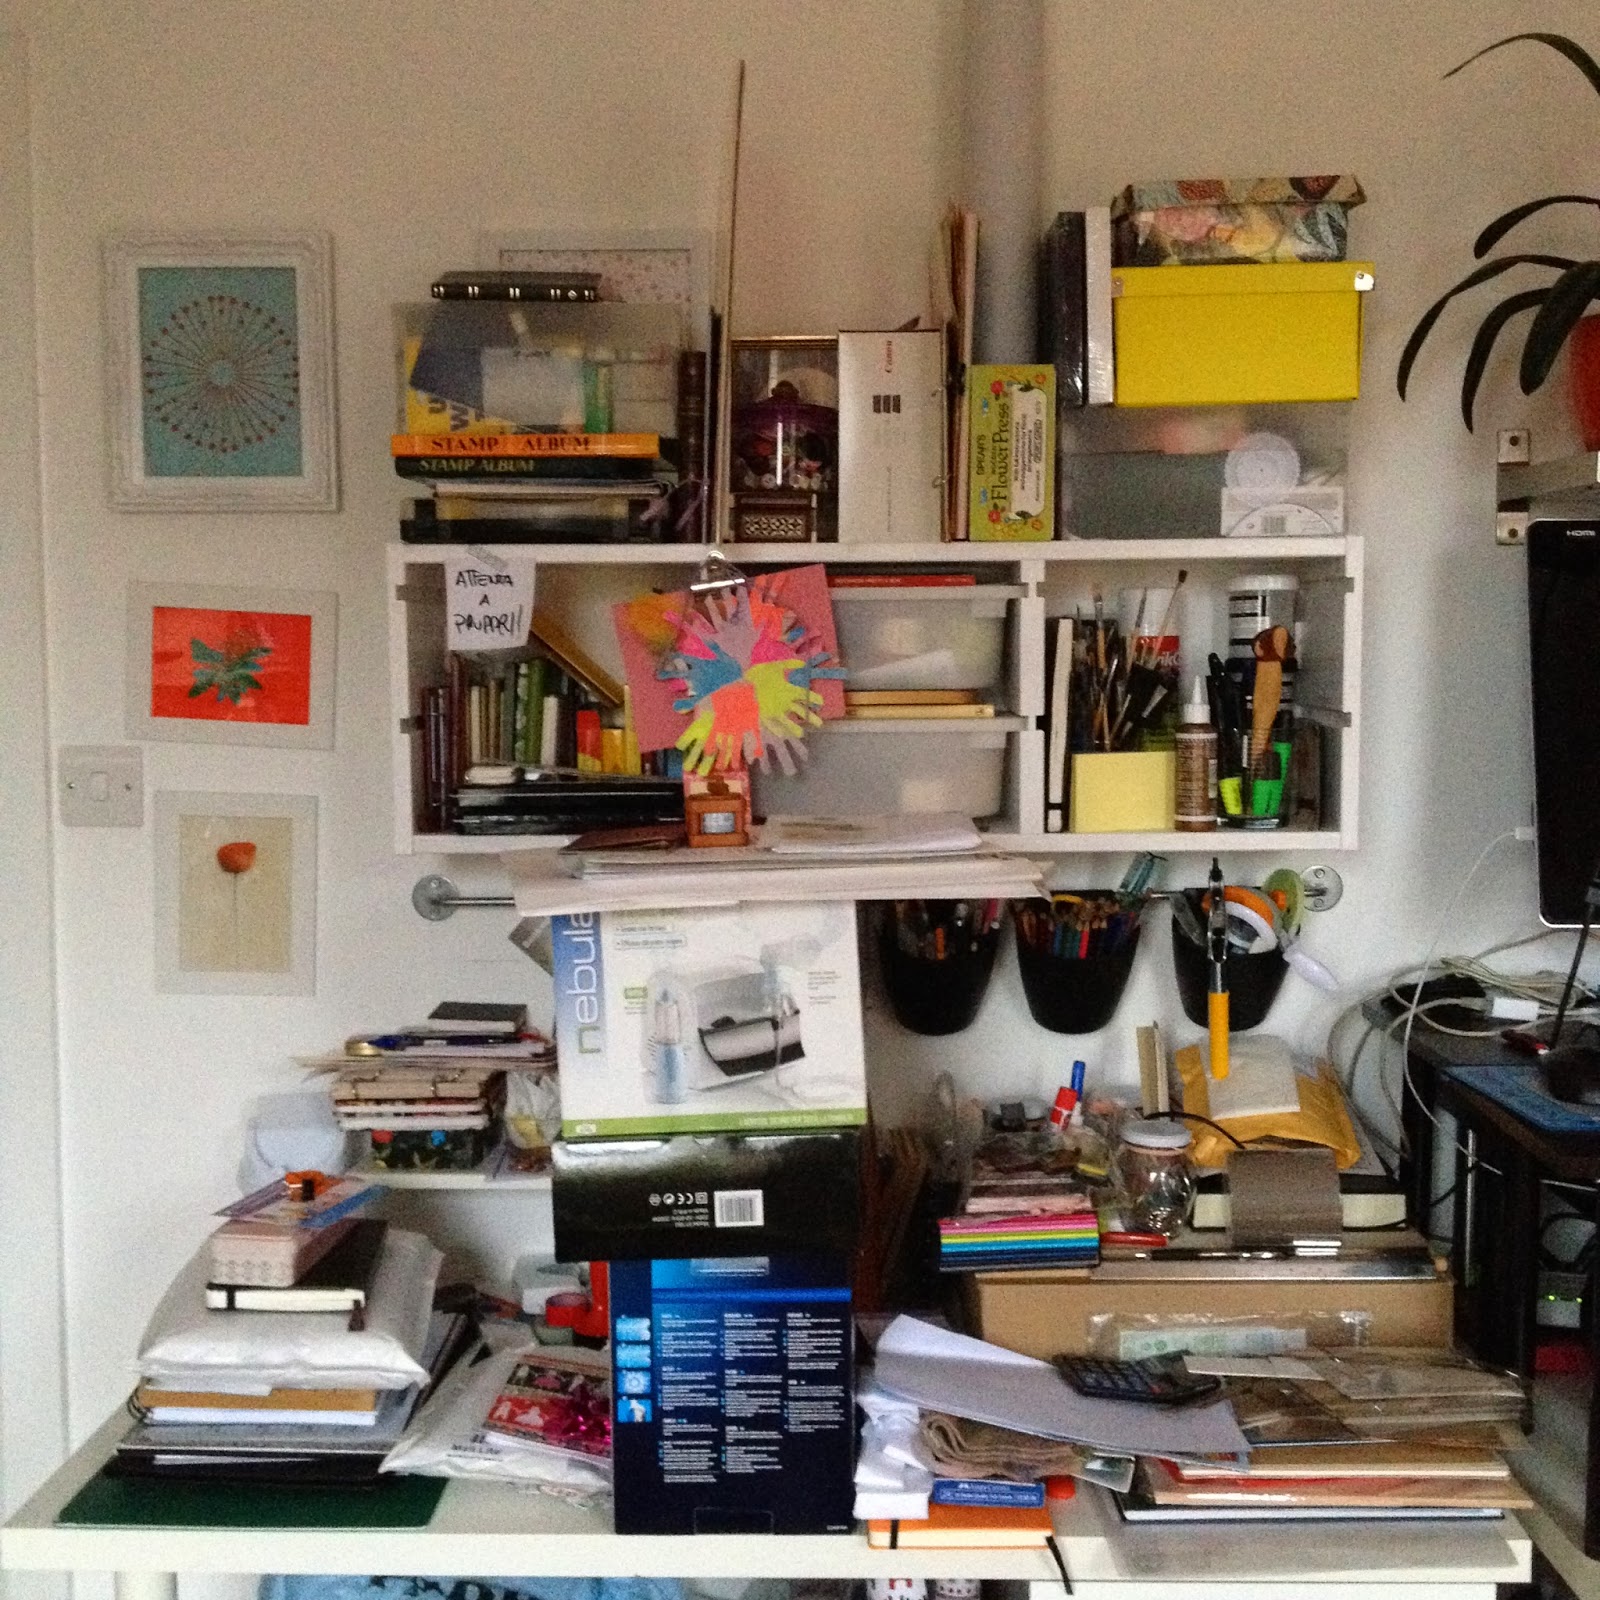
For the past year or so, this working space has been neglected big time! It has become a place to dump stuff waiting to get sorted, making it a living mess and an unusable surface. Without mentioning the fact that my 2 year old was extremely interested in what was going on on the desk and as soon as she was able to pick above it, we had a few accidents…including inking her hands with black permanent ink!
So, to go with my word for 2014, CREATIVE, I thought it was time to gift myself, once again, with a creative space where to explore my word and live all the mess of my living room behind.
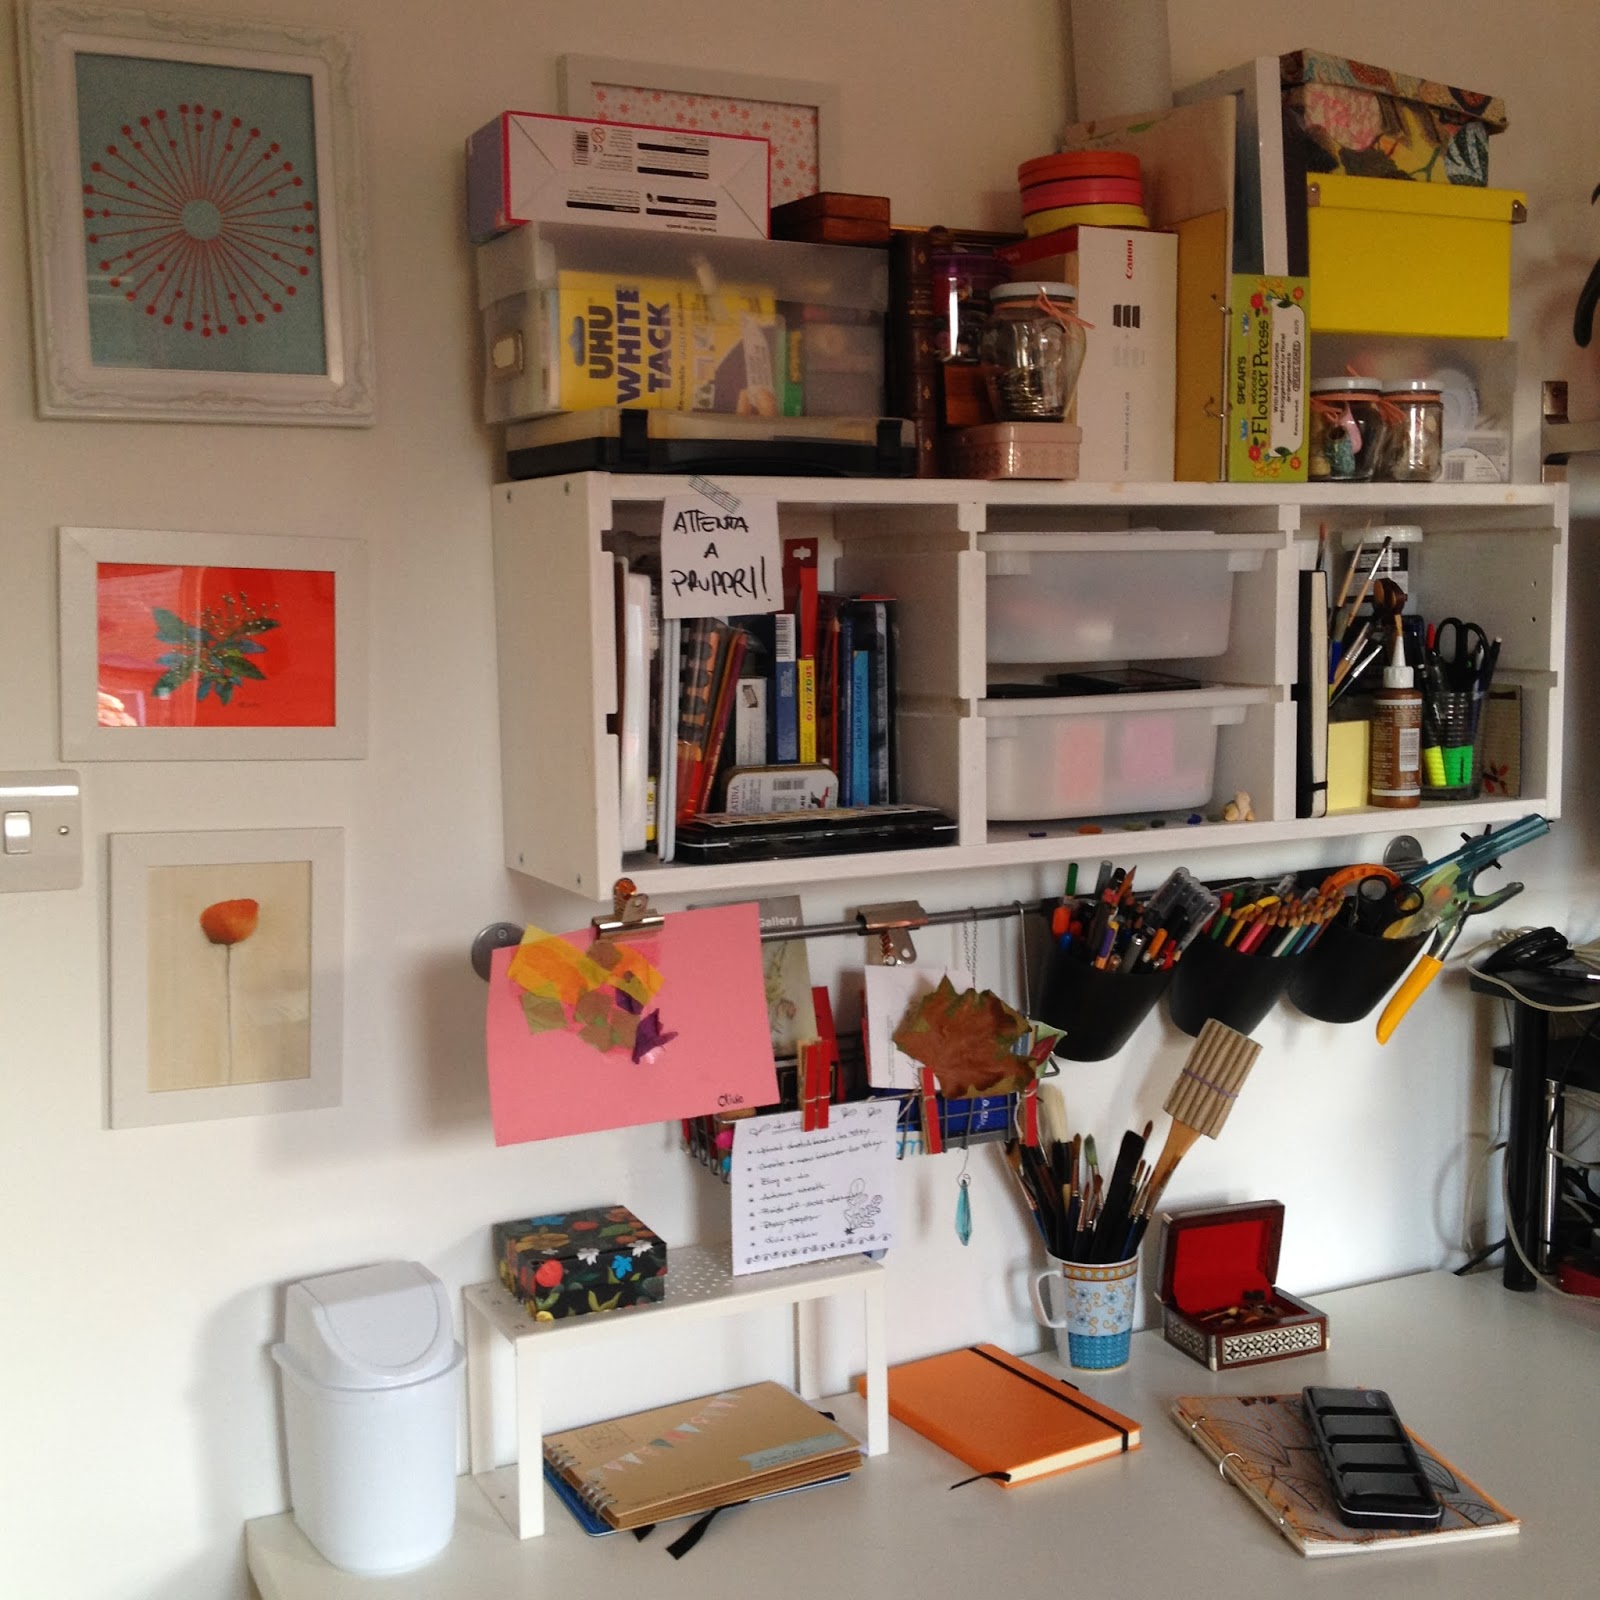
I cleared the desk and organised, more or less, the storage space.
Halfway there
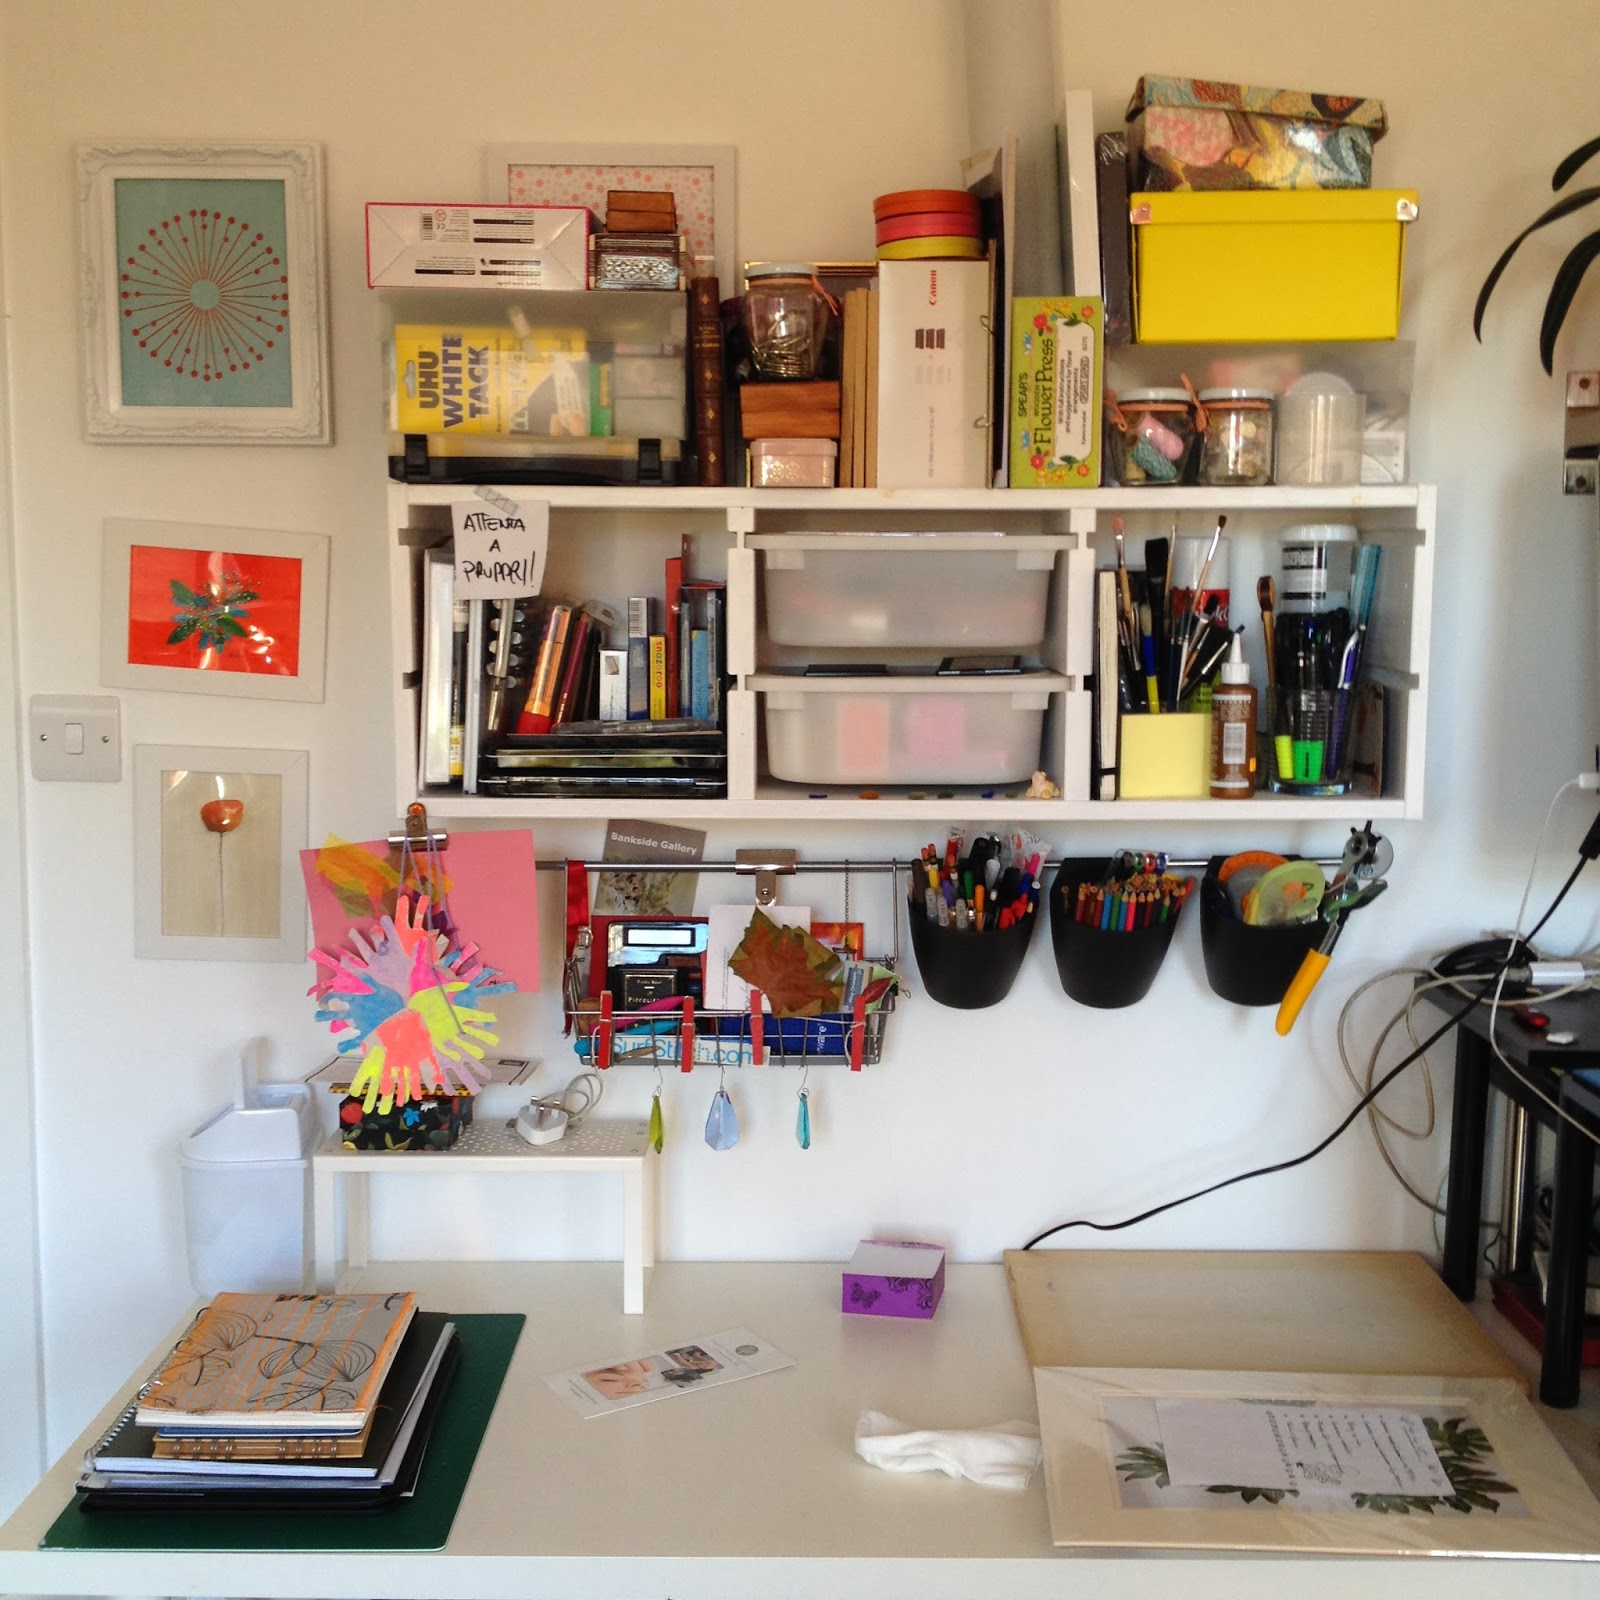
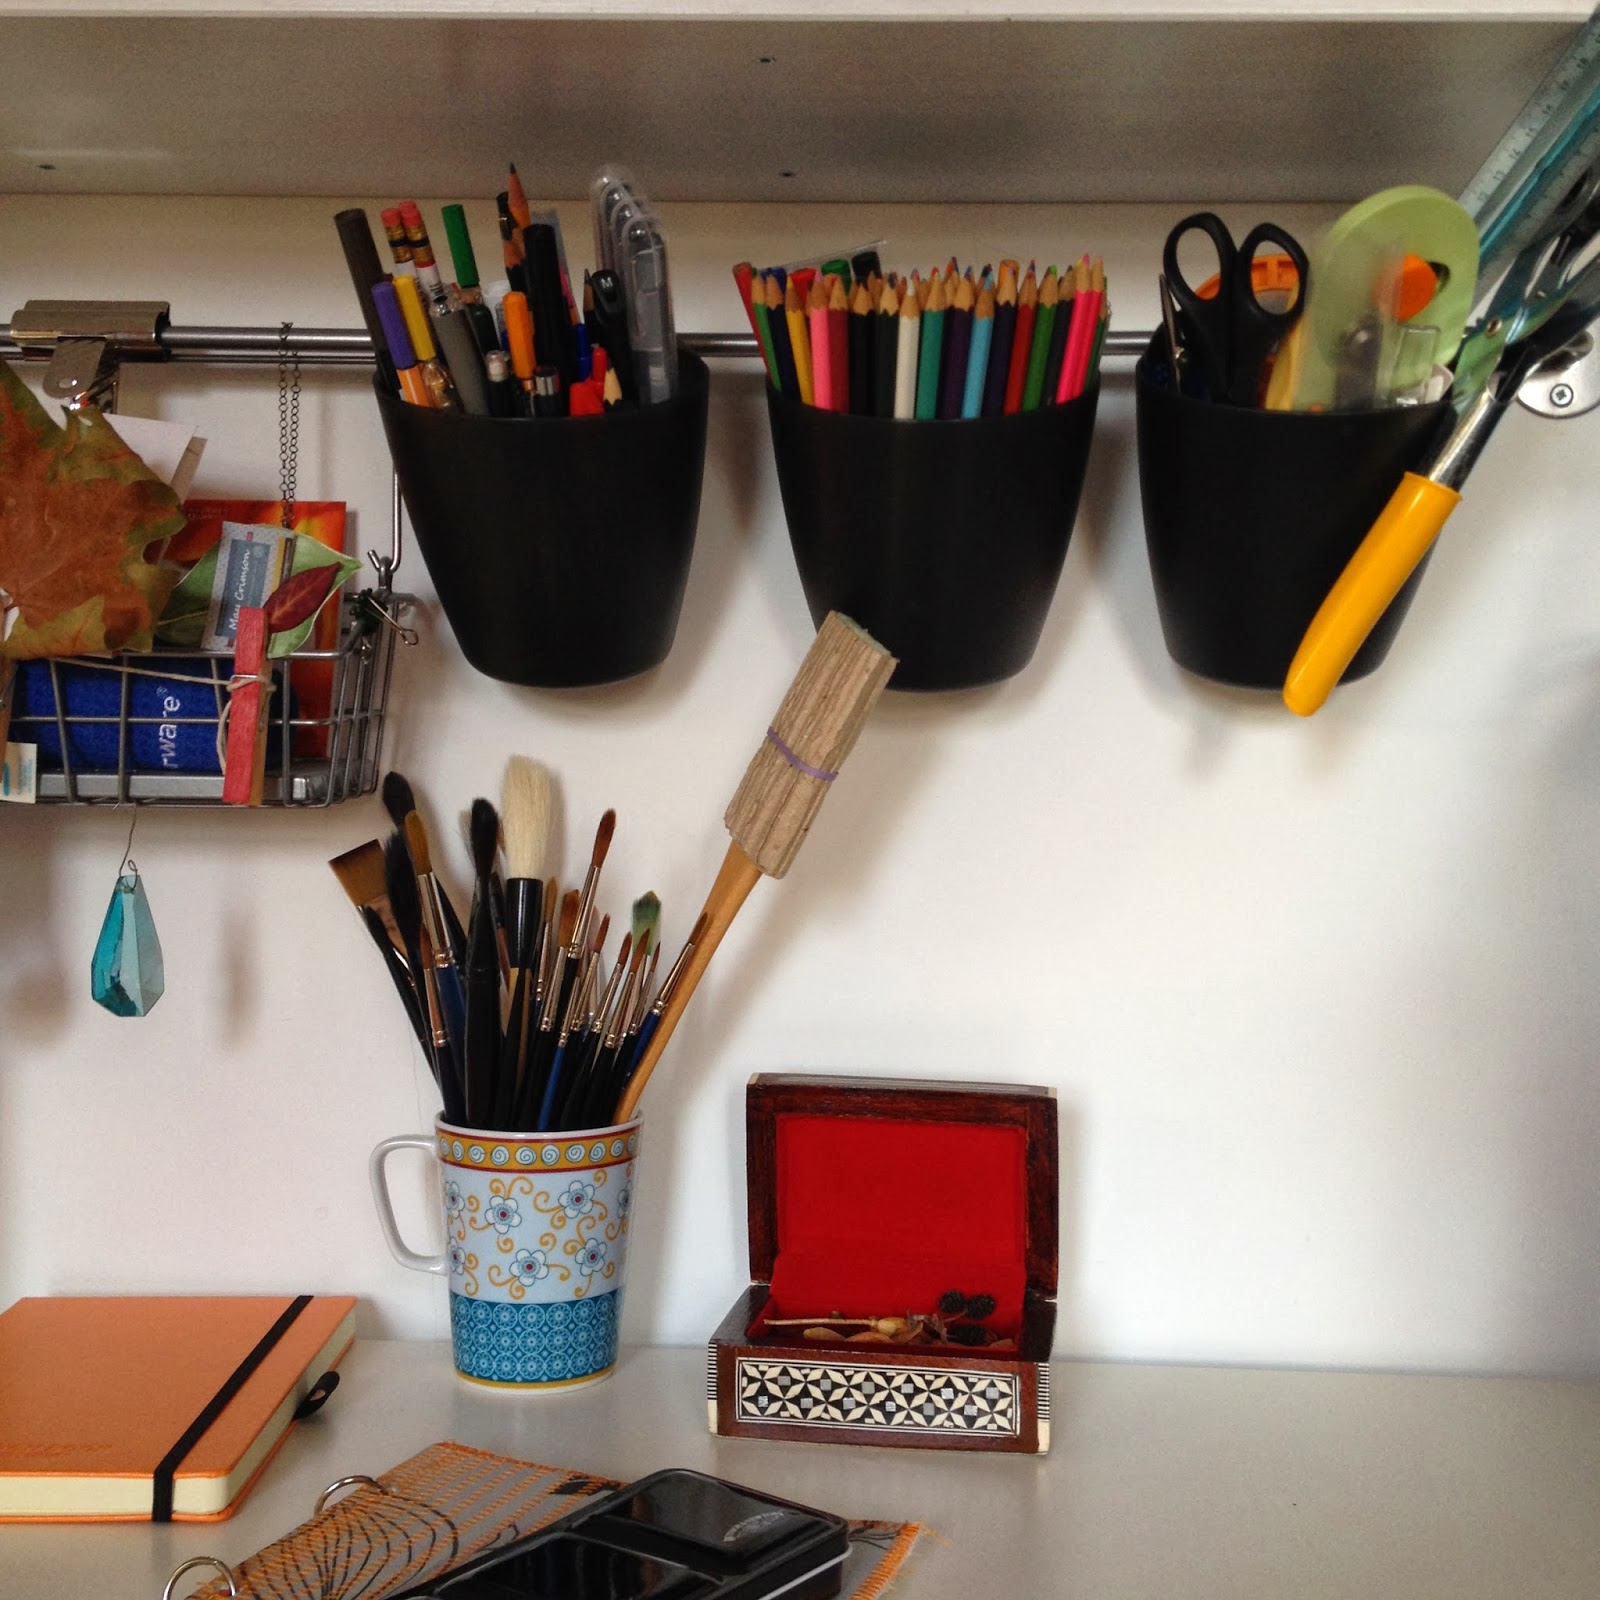
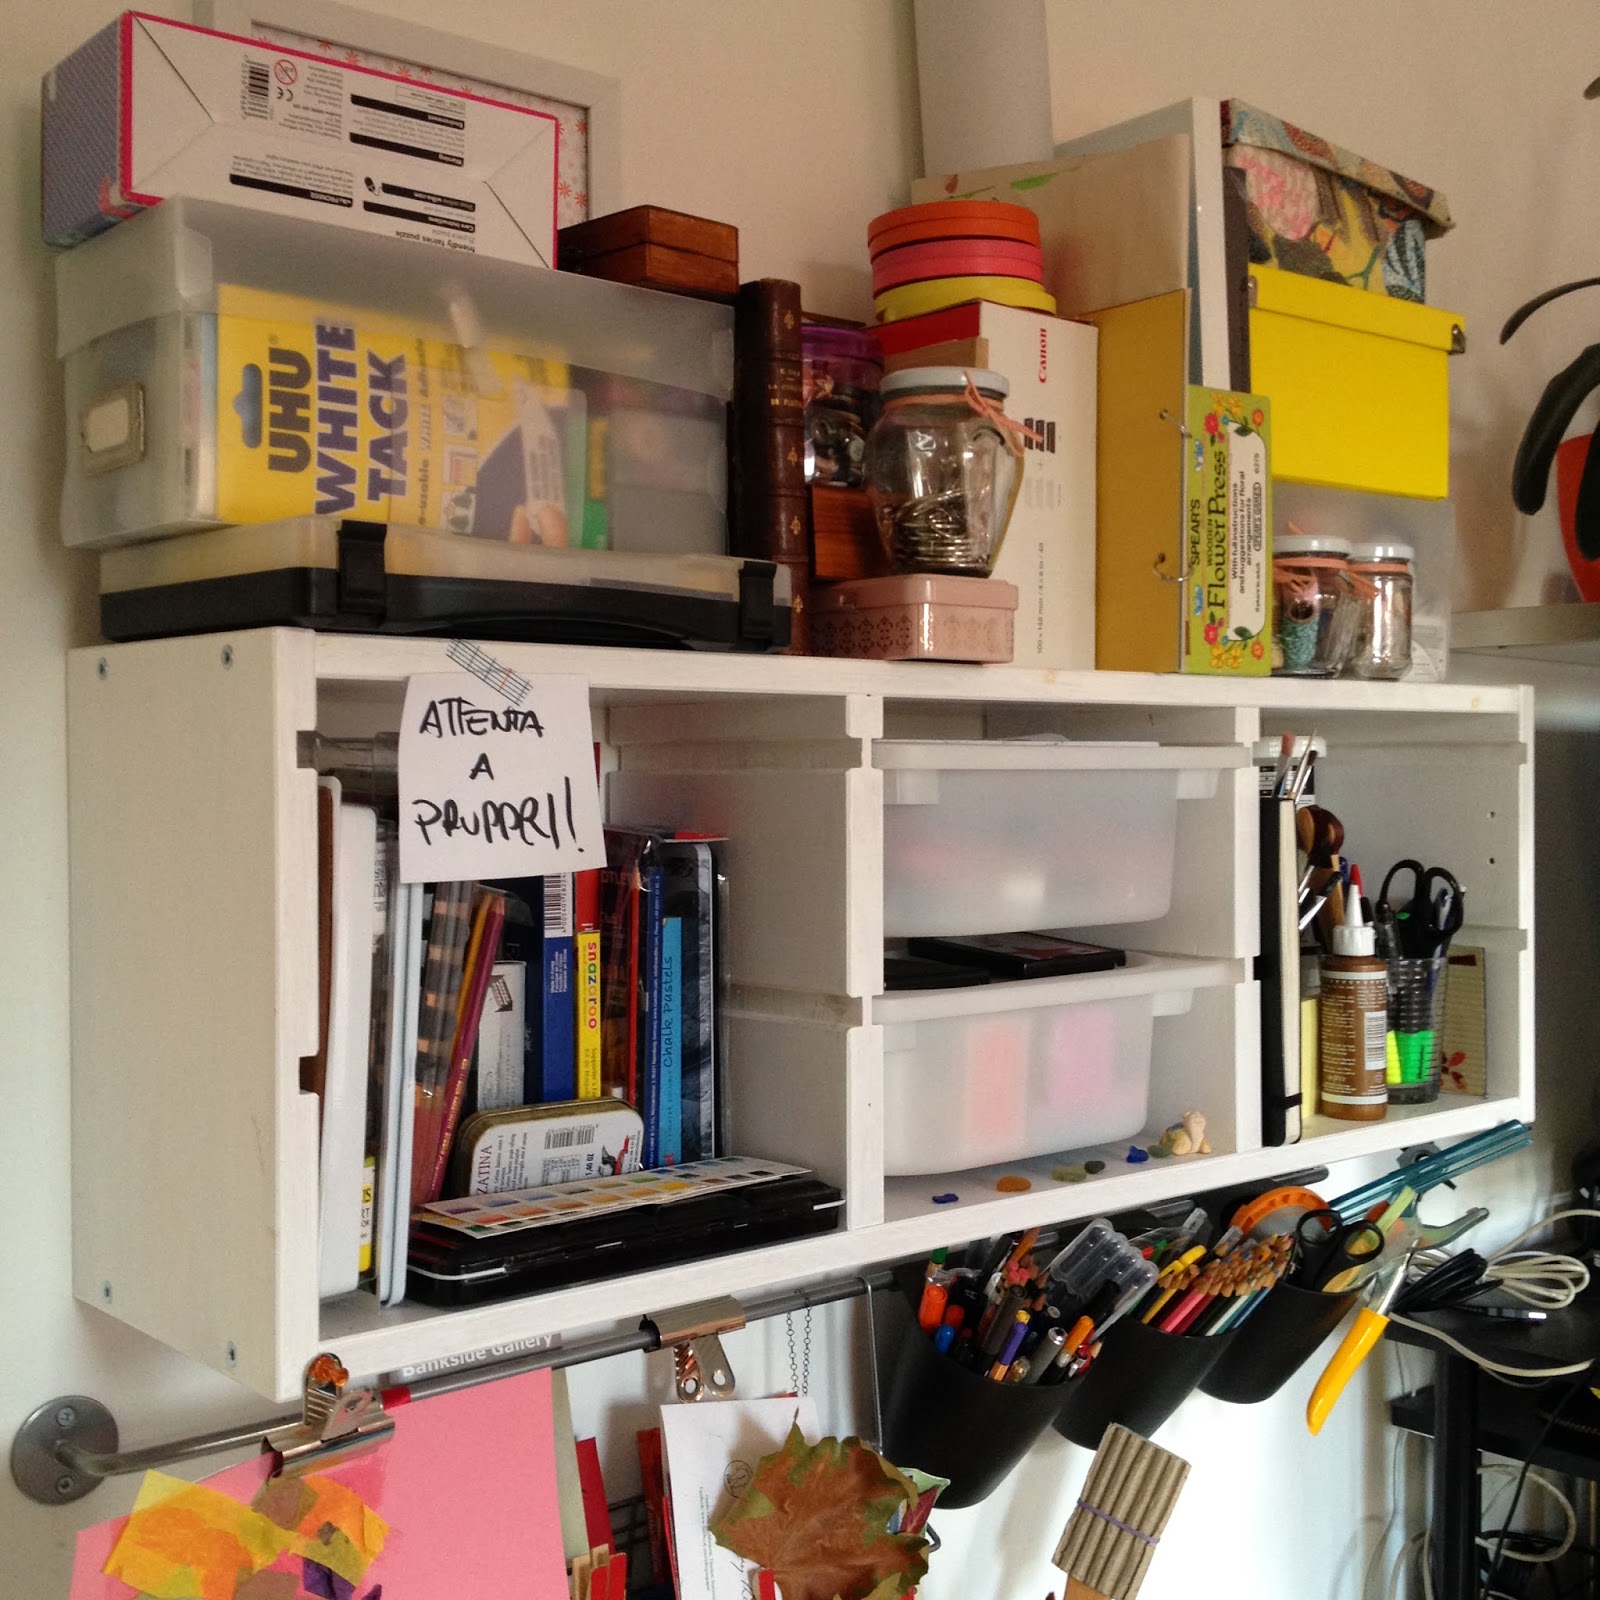
Loose pens, pencils, colours, scissors and cutters are stored in three black containers, while I keep some cute cards, mails and generally any unclassified stuff (including my hand cream!) in a wired basket all hanged on a rail mounted on the wall. This turned out to be a great workspace saver.
The white wall storage unit contains a bit of everything. My on-going pocket/small sketchbooks and all boxed paints, pencils, pastels, etc are stored in the left hand side. The middle section has two storage boxes which contain all my stamps and inks and some more colours. The right hand side houses sprays and varnishes, and a pencil holder where I keep some highlighters, pens and pencils that Mr G is allowed to use (as the rest if off limits).
The top of the unit houses a few boxes, containing generic stationery, my sewing tools and craft supplies, refills for my printer, some jars with all sorts of buttons and some artwork.
My sewing machine and a wicker basket with all my knitting tools and on-going knitting work are kept under the desk.Together with some imperial sheets of watercolour paper.
The drawer unit is my favourite. It has 5 drawers and each is designated to a specific activity:
minibooks; painting tools; cards making supplies, including lino printing, embossing and die cutting tools; fabrics; notebooks and sketchbooks. 
Additional fabrics and painting supplies and all my books, magazines, reference materials and sketchbooks are not so neatly displayed on the bookshelf, but I’m working on that too.

I love this space, I love sitting in my chair and feeling creative, I love that when I’m at my desk the rest of the living room is behind me and I can concentrate on what I’m doing. It feels like I’m in a completely different world.

Hand Painted Door Knobs

When we renovated our flat a couple of years ago, we decided to keep the original doors throughout. We stripped them out to bare wood and repainted them white. Then we went shopping for some coloured door knobs, but we couldn’t find anything we liked. Mostly the ones we fancied were designed for cabinets, and not really suited for our doors. I did some searches online and came across some beautifully hand painted knobs by Sweet Mix Creation on Etsy. I really fell in love with all the colours and the simple designs. And I thought, why not, I can do this and so I did. We found some basic (meaning cheap!) white ceramic knob handles in our local diy store, they had to be slightly modified to fit our doors and that’s where my dad came in handy…he did a marvelous job!  
These are all the materials I used:
  • White ceramic knob handles, like these ones;
  • Ceramic Paint – I used the Marabu Ceramica Porcelain and Ceramic Paint in 15ml pots;
  • Round Nylon Brush – I used the Pro Arte Polar Brush no 4.
I did quite a number of sketches before choosing the design I wanted to go for, and this was fun too. I just used some felt tip coloured pens on sketching paper.
Once I made up my mind, I tranferred the design on the knob surface using an HB pencil. This was a bit tricky because the surface was curved and my hand had nothing to rest on.
Then the fun part begun. I used the paint stright from the pot, and literally dropped it onto the surface to make dots. If you attempting this, just a little bit of advice…don’t use too much paint otherwise the drop will start dripping on the side of the knob as the surface is not flat and you’ll end up with a paint drop rather than a dot…I know this from experience!

Then I let it dry for about 24 hours. Because I didn’t need the knobs to be waterproof, I didn’t oven-bake them.They have been serving us brilliantly so far and been added a subtle colour touch to our doors.

These are the ones I made for our living room to match the orange theme of the room. And the blue/turquoise ones are for our bathroom door. There are still two sets to do, a purple one for our bedroom and a green one for our kitchen. They are on my to-do list!

Summer memories

I love collecting memorabilia from the beach over the summer months. I remember  collecting all sorts of pebbles, wood sticks, roots, shells and whatever I could find on the seaside when I was young. But really never got to use any of these things, they used to end up in the bin as soon as we were back home from the holidays.

This year I decided I would make something to remember the summer days we spent in Italy. I collected some halved cane sticks from our favourite beach in Roccelletta (Calabria, Southern Italy). I cleaned them from all the sand and cut them to the same length leaving some rough edges.  I had already bought one of those deep frames from Ikea from the bargain corner a while ago, which hadn’t found any use, so far. I glued the sticks to a cut-to-size 300g cream paper which G brought me from paper source and used a 2B pencil to write some text at the bottom.

I haven’t found a place on the wall for it yet, but I already like the idea of looking at it during the next winter months and remember the sunny days we spent relaxing on the beach.