5″ x 5″ series

It all started a few months ago, on a day I was feeling not so positive and needed to boost up my mood. I had paper with me and a red highlighter. I started to draw squares and to write and draw stuff in them. And so it began, my 5”x5” series. I started to experiment with different types of paper; watercolour, Bristol, ruled and cartridge, and different pen and pencils; highlighters, markers, fine liners, watercolours. And I liked the idea of building up a portfolio. I started to search online for the perfect folder, but I couldn’t find anything I liked. The size of the cards is actually the same of a CD player, but the sleeves mostly available are those with a paper backing and a v cut on the front; and really don’t like those. So I ended up buying a bunch of plastic sleeves with flaps and hole punches, and to keep them together I made my own cover. I used two thick cardboards and cut them slightly bigger than the cards. I then used some scrap fabric which I glued on the two cards and some heavy gold paper to finish the inside. I covered the fabric with a thin coat of clear gesso and, once dried, I used a black permanent marker to write on it. I didn’t like how the back cover had turned out, so I had to make some adjustments. I painted the back with some red acrylics, waited for it to dry and then wrote on it again. I then hole punched the two covers and used two ring binders to hold everything together. I love it! 
Front and back covers
Red fineliner 0.5 on bristol paper and watercolour on watercolour paper
Red highlighter and black permanent marker on ruled paper
Blue higlighter on 4″ blank paper
Red fineliner 0.5 on bristol paper (5″x3″)
Lino cut ink print 
I am having so much fun drawing/writing in these 5″ squares that I am planning to experiment a lot more with these and to expand the collection. And also thinking of framing some of these cards using a square black or white frame. 

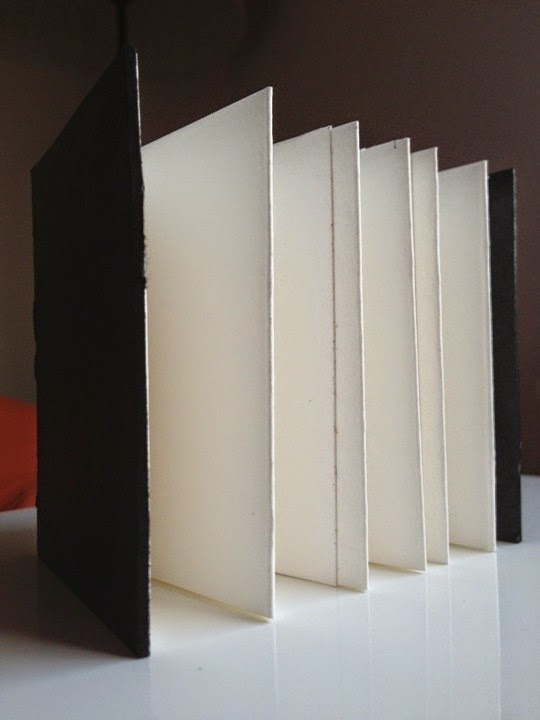
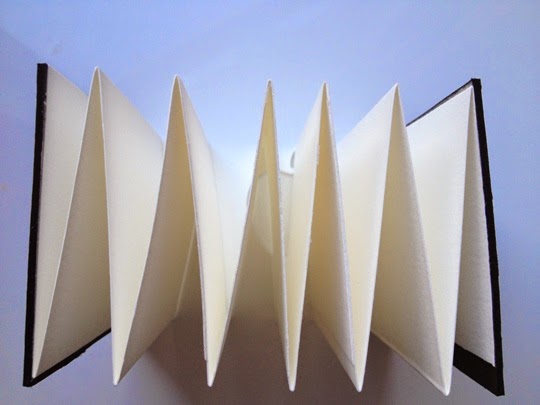
Handmade concertina book

I have been pretty much obsessed with notebooks, diaries, and paper in all forms all my life. But only recently I rediscovered the pleasure of making my own pads. I always had the feeling that everything I make is not as precious as something I buy. I know it doesn’t sound right, but the reason is that whatever I make, I can make it again if I screw up. And that gives me a sense of freedom, makes me more adventurous, makes me experiment more with my tools.


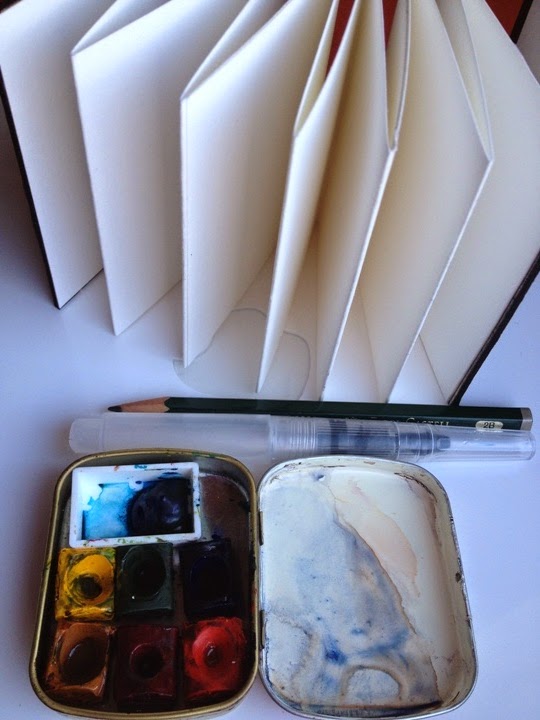
As part of an online mini-class I’m doing on quick sketching (here), I have made a small concertina book using some scrap materials I had handy (cardboard and some Fabriano watercolour paper). The book is very tiny (5x8cm), meaning is not daunting to take it out of my bag and start sketching on it and it can be easily carried in my pocket. And it is the perfect size for quick sketches and notes.
 
 
The design I’ve chosen is very minimal, a black cover with no frills…it is a very low key pad. I have used two elastic bands to keep it folded as they can also be used for holding pencils and keep the pages of the book flat while drawing. It’s the perfect tool to go with my handmade watercolours box, my short 2B pencil and my Sakura Koi water brush.

This is life

Starting a new collection of 5″x5″ watercolour cards. Still struggling to find the perfect folder to file them. 

My current notebooks

What I’ve been carrying around lately
Every year, around December time, I start planning the essential kit for taking notes, writing down appointments, sketching, etc that I will be carrying around the following year. It’s a process that I’ve been doing for years and that I still enjoy very much. What I normally do, is going through my diaries/notebooks/paper pads that I’ve used during the year and make a decision on what has been essential or superfluous, what has been useful and what hasn’t. Over the years I have found some combinations of diary/sketchbooks that have worked very well for me; my very minimal kit consists of a pocket size weekly diary and a small sketchbook, with some variations.
My favourite diary is a black soft cover pocket size Moleskine weekly notebook. I love it, because it has the weekly calendar on one side and a blank lined page on the other, which is great for taking notes, making lists, write down thoughts, etc.
But I like to make some changes once in a while, so this year I decided to use one of those complimentary diaries that my auntie receives every year from pharmaceutical companies (she’s a nurse). The size is the same as the Moleskine, although inside is slightly different as the weekly calendar is spread on two pages.
Inside I’ve added a pink Bobino slim pen, which is great. I got it as a Christmas present from my cousin this year, and I absolutely love it! It doesn’t get lost in my bag and it’s so slim, you can hardly notice it’s inside the diary.
The diary is just a diary; I use it to record my daily appointments, birthdays, holidays, grocery lists. I could easily replace it with an online calendar, but let’s face it; I just need another excuse to use a pen and some paper!
I always carry around a sketchbook with me. I hold an extensive collection of sketchpads which I have going at the same time, but tend to use in different occasions.
They have been around for quite some time now, and one of my last year goals was to complete all of them, one by one. This is still an ongoing project, and it is proving a slow process, but the biggest motivation for me to complete it, is that I’m not going to buy any new sketchbook until I’m done with the old ones. And believe me, I already have a long list of new paper pads I’m dying to get my hands on.
The sketchbook that I’m currently using is a Moleskine watercolour notebook (13×21 cm, 200gr cold-pressed paper). It has a hard cover which is prefect for sketching on-the-go and has a useful inside pocket at the back, which I use to store some extra paper and a sheet of paper with swatches of watercolour pencils.
(Those little fingers on the left side had some fun using the above colour palette) 
Along with the sketchbook, I carry, as a minimum, a pocket size Windsor & Newton lightweight half pan box containing 12 Artists’ Water Colours, a medium size Pentel waterbrush and an HB mechanical pencil.
This kit, although minimal, is not as light and small as I’d like, but is utterly necessary, so I can’t really complain. It’s always in my bag, I take it with me every day; you never know when you may get some spare time to draw, better be prepared!
To make things less easy this year I have added a new notebook to my carry-around essential kit.
It’s a lined B5 notebook I bought about 3 years ago from Muji (similar to this one) and never found the right use for it. It has about 30 pages and it’s very very light. I’ve combined it with a turquoise Bobino slim pen and I use it to take personal notes, jot down ideas, make plans, write down to-do lists. It also goes along very well with my small post-it notes, which somehow I tend to use very often and that get stuck around all over the place; now they have a special place to go to.

 We are almost at the end of February now, and so far my 2013 carry-around set has been working perfectly. It does the job, it gives me the chance to make a physical record of my day, my ideas, my emotions. All three notebooks are very personal to me, and apart from the sketchbook, which I share on this blog and Flickr from time to time, the rest mainly remains private:  they don’t need to look pretty and this gives me the freedom to do with them whatever I feel like, they represent the true me, without any artefact.

Improving my handwriting

Handwriting: the way a person writes

When I was little, probably around 10 years old, I was obsessed with handwriting. I remember filling pages over pages during the summer break, practicing the alphabet. If I look back at my school notebooks, sometimes I can’t recognise my own handwriting…..I had so many different styles, and I would change it at the start of each school year. Even my signature has changed considerably over the years. I remember once, the clerk at the bank ask me to ‘copy’ one of my old signatures, because the way I was signing now was different from the way I had signed only few months back. My handwriting kept changing over the years, and despite the obsession, I couldn’t find a nice set of letters to stick to that would satisfy me entirely.
I stopped caring about my handwriting up until last year, before I started writing down my daughter’s record book. I wanted it to be perfectly written, so I started practising a bit again!
First thing I did, was to have a look at other people’s handwriting. I always admire people who can write neatly and elegantly even if they are compiling a shopping list. One of these person is my mum; she was a primary school teacher so she had a lot of practice! 
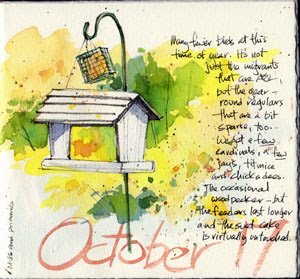
I also love people who can complement their drawings with nice handwritten notes. Love Cathy Johnson sketches and the way she collects info and thoughts about the subject. 
And what about the botanical sketchbooks of Mary Ann Scott…it’s my dream to create one of those! 
Or Kal Bartesky writing art 
And while browsing to find some inspiration I came across Austin Kleon’s blog and his article on how to improve your handwriting
What a relief knowing that I’m not the only one obsessed with handwriting.
So pen in hand I started practicing….
And practicing…
I tried different pens, different papers, different ways of holding a pen and different ways of holding the paper (try writing on a vertical board using your arm and shoulder rather than your fingers or wrist, you’ll be amazed at how the strokes can become smoother)…
And I began writing down the alphabet again…

The picture above was my first attempt to make my own font using this online tool…it was kinda cool to have a preview of how my own handwriting would look like in the digital world.

I’m still not 100% happy with my writing, but it’s getting better and, most of all, I’m enjoying the overall process. It brings back some happy memories and it helps me to release the tension.

I’m always on the lookout for pretty handwriting and thinking of taking a calligraphy course and maybe this BRUSH SCRIPT workshop.

Note: All the pictures above were taken with my phone, with the exclusion of those linked to the web.